Copyright 2005-2025 Cabinet Planner LLC
System requirements:
• Windows XP through Windows 11 with 6Mb free space.
• Screen resolution 1440 x 900 or larger
• Mouse, keyboard and printer
• Opengl compatible video card (almost all are these days)
• Download size: 5.3Mb
To download and install:
1.Click the download link and select run
2.Once the download completes select run
3.Completely read the license agreement and click "I agree" (This is NOT a commitment to purchase the program)
4.If you receive a Windows security warning click yes to continue
5.Keep clicking next and the installer will put the program in your Programs Folder
6.Make sure to put a check in the box for the desktop icon, even if you already have one on your desktop. This will insure that the icon is linked to the correct version of the program
7.Click finish and you are done installing
To install from the disc:
1.Put the disc in your cd drive
2.If autorun is enabled on your computer the installation wizard will start in about 10 seconds. Go to step 2 in the Download and install instructions above
3.Double-click your My Computer icon on your desktop
4.Double-click the icon for your cd drive
5.Double-click the Cabinet Planner icon
6.Go to step 2 in the Download and install instructions above
Registration -- ( Not required for Free Trial)
The first time you run the program a small window will open asking if you want to register the program. Click ‘Yes’ and the registration window will open with your “Product # ". You will not be able to run the program more than 10 times without entering your verification code. Send an email to me, including your Name, Address, and Product #. I will reply as soon as possible with your Verification code. After you enter it once, you will not need to do it again.
Setting up the program:
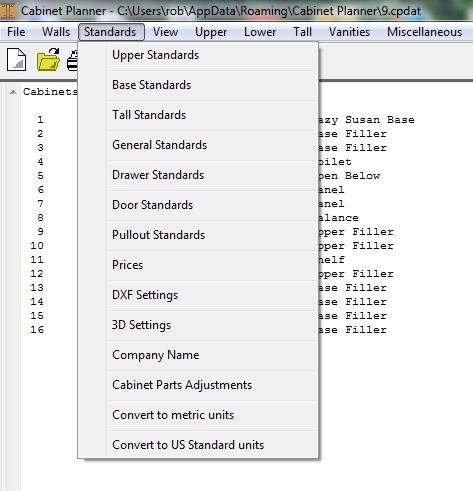
1. Click on the Standards menu at the top of the main window.2. Open the General Standards and adjust the program font height as needed (see pic below)
3. Click on each of the standards menus and fill in your building preferences. These sizes can be changed at any time.
5. Click on Company Name. Enter the name of your company. This will be put on the page heading of everything you print.
6. If the Toolbar appears too small you can choose to use a larger one.
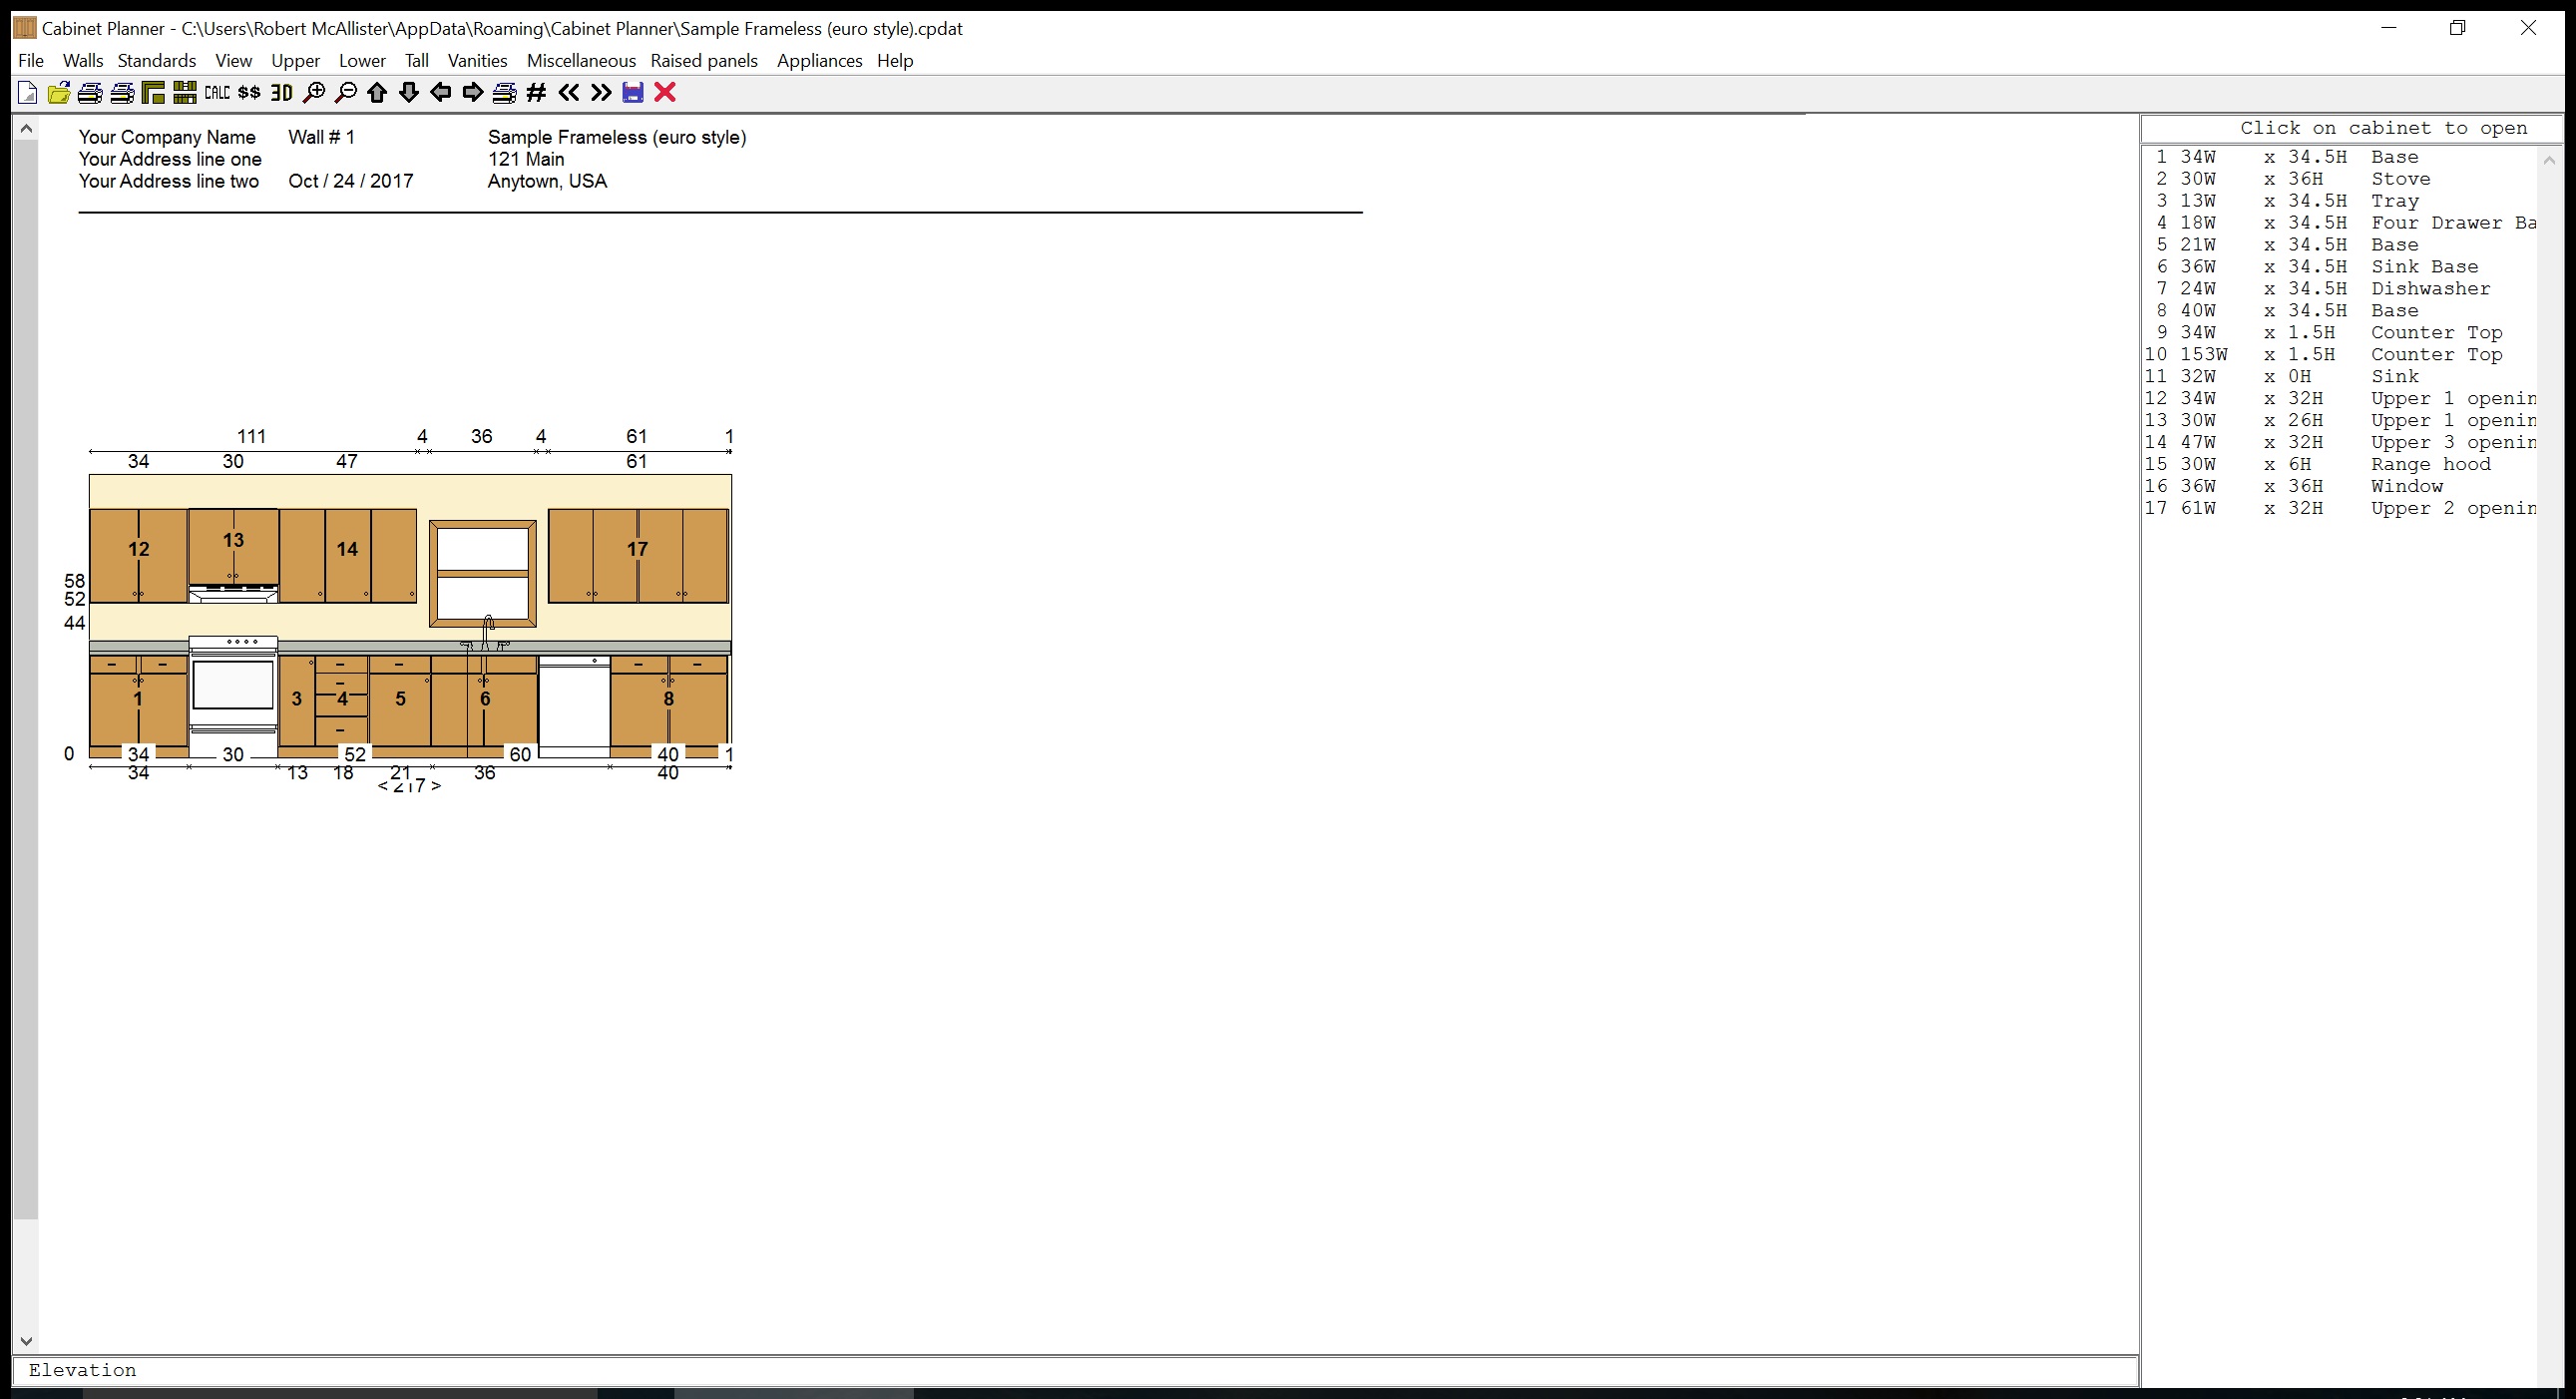
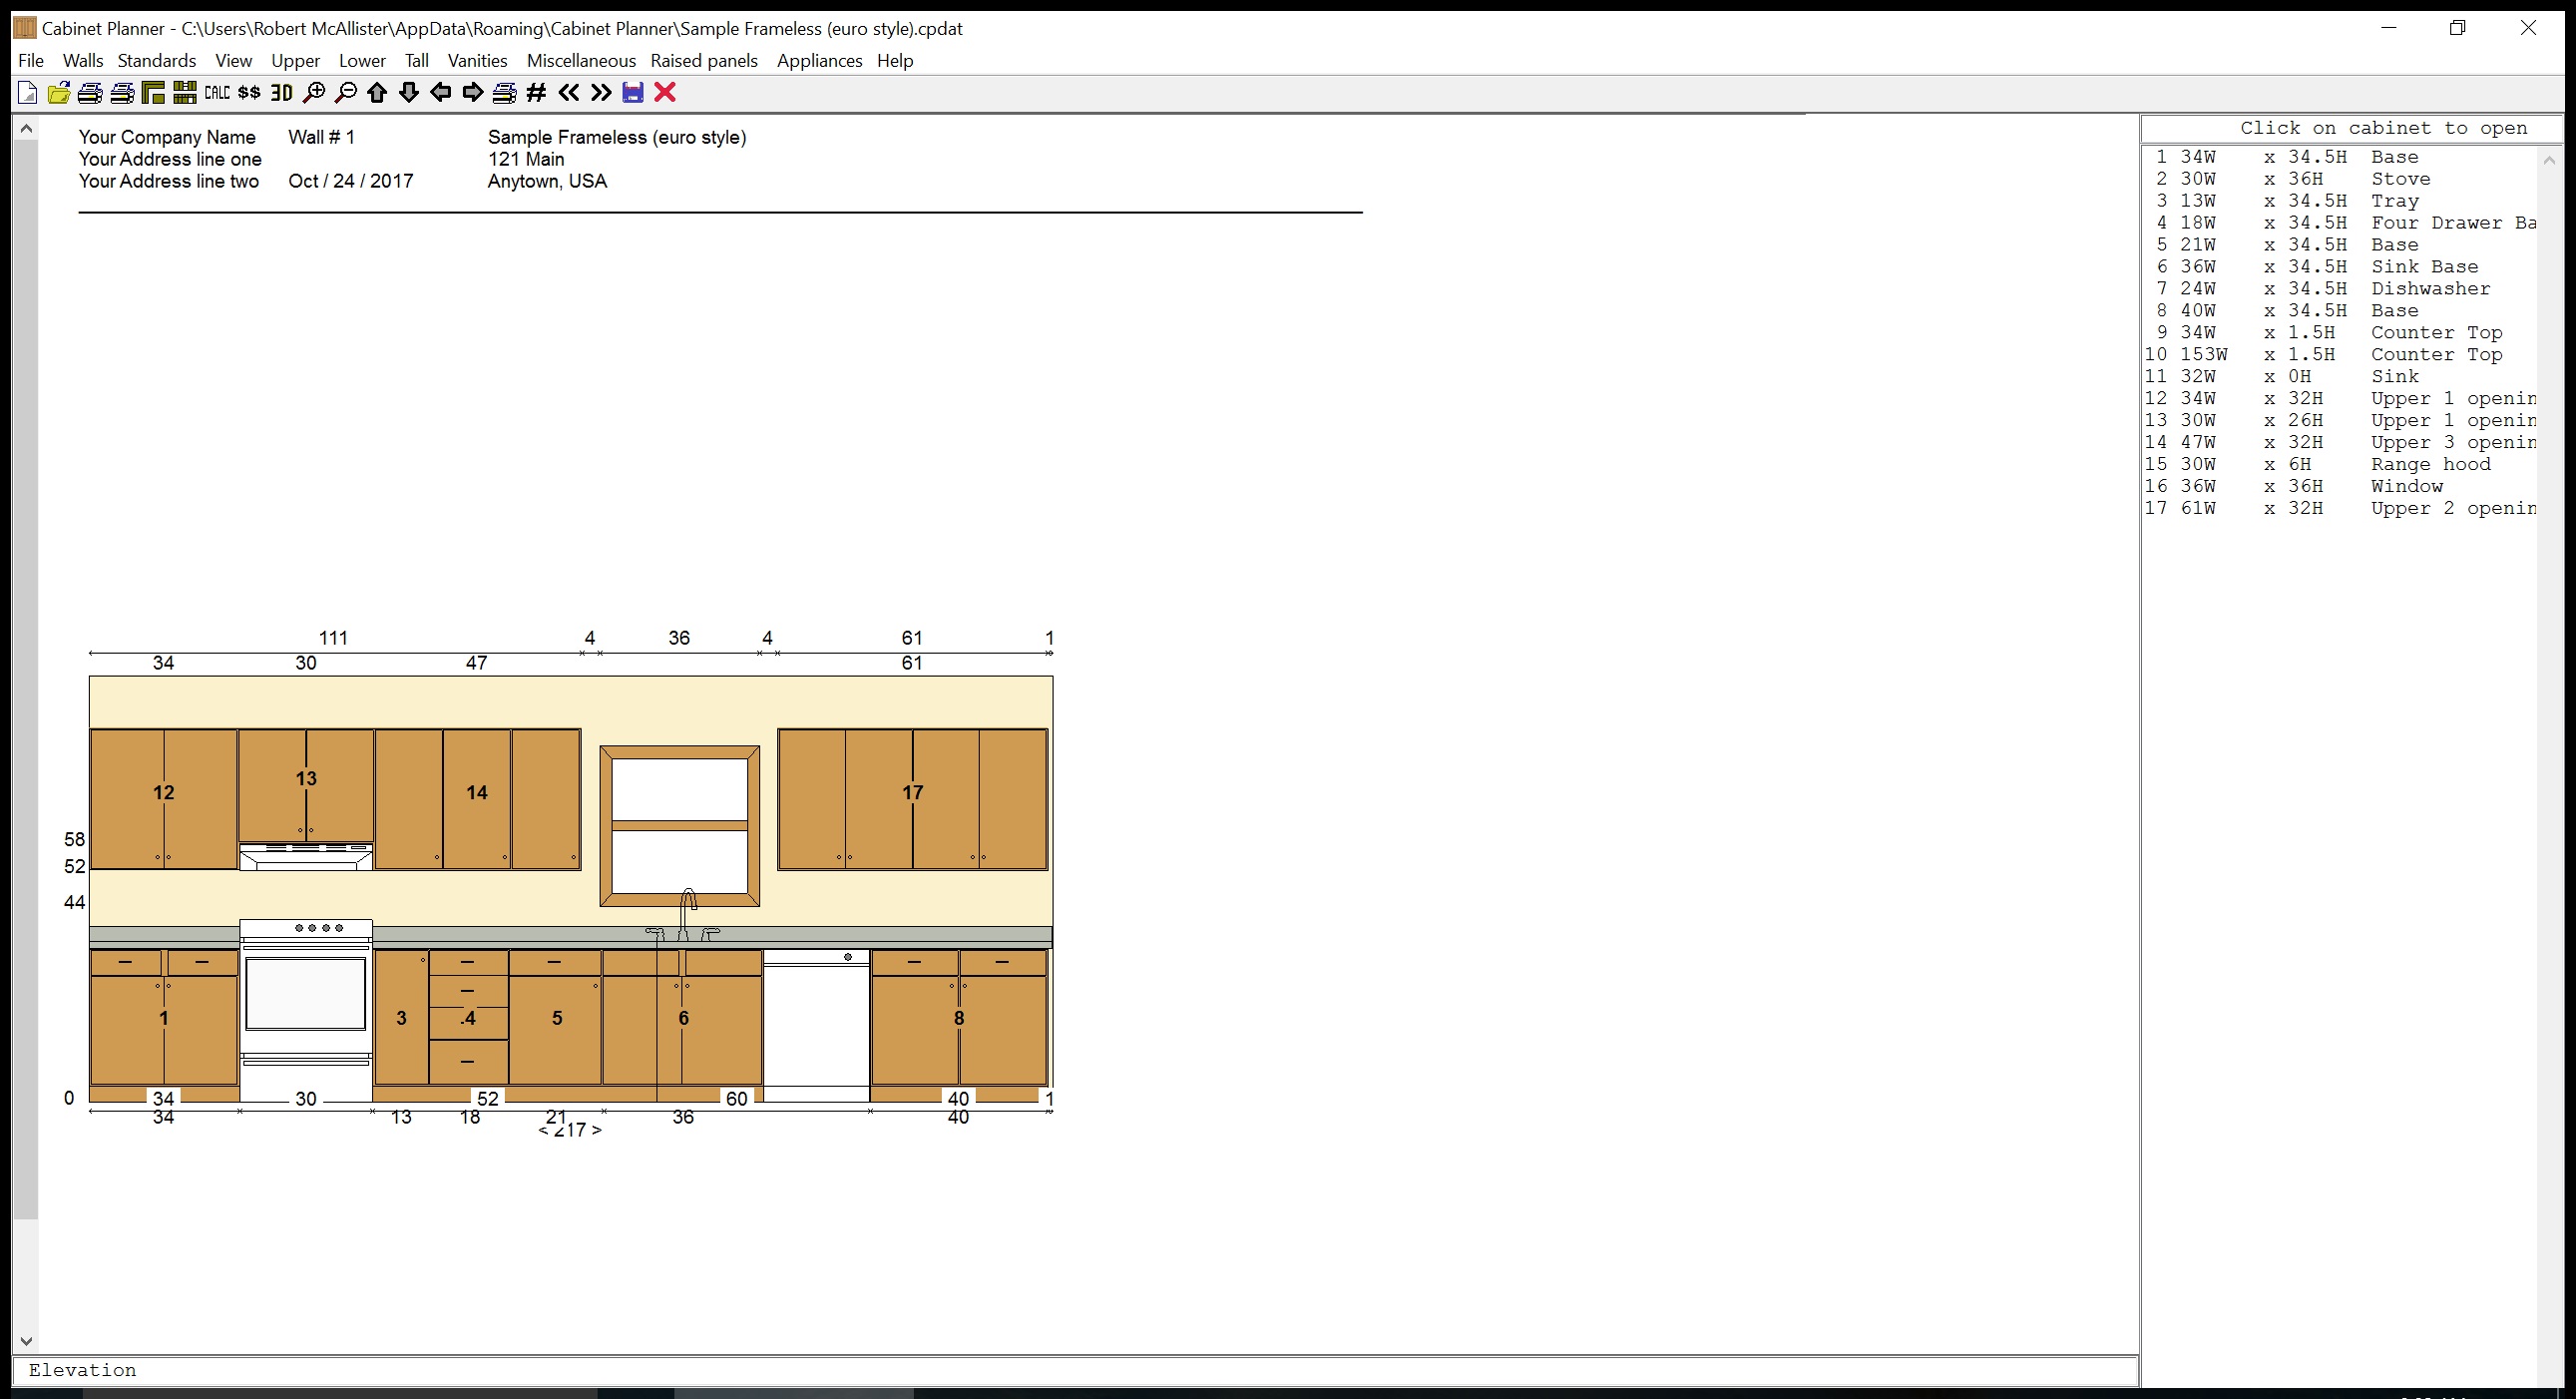
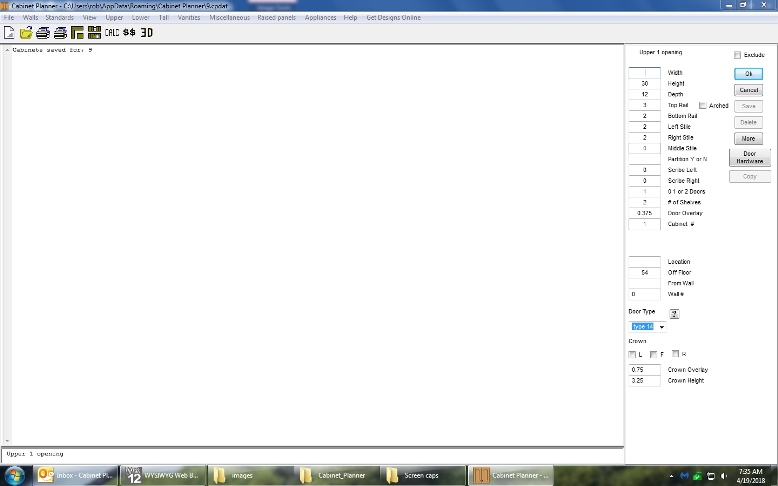
Planning your first cabinet:
1.Press the New job button and enter a name for the job.
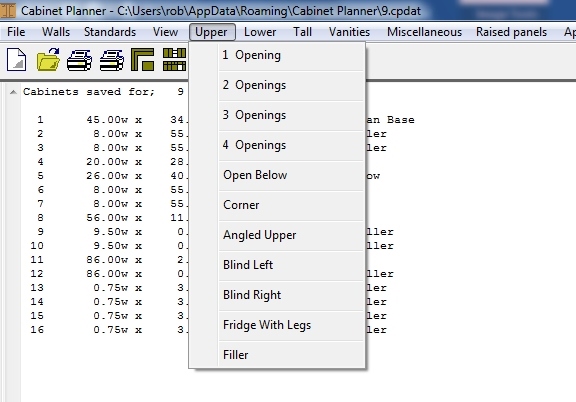
2.Choose a type of cabinet from the menus at the top of the main window. I'll use a 1 Opening upper for this demonstration.
3.A cabinet editing window will open.
4.Fill in the width and make any other changes you want. Click the OK button at the top of the window.
After clicking OK a shop drawing review window will open. You will need to scroll down to see the picture of the face frame front view. If everything looks OK press the Print or Save buttons. If something needs to be changed press the Edit button and the edit window will re-open.

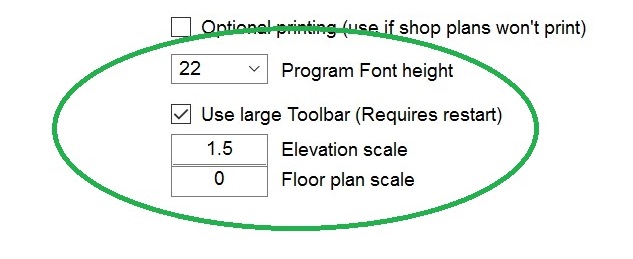
Once you begin adding cabinets and veiwing the elevation & floor plans you may want to increase their size. This can be done with the two scaling settings above. The first picture below shows the program running on a 2560 x 1440 screen with the DPI set to 150% The second pic shows the same with the elevation scale set to 1.5. The third picture below shows the larger toolbar.