How to cut and prepare cabinet boxes
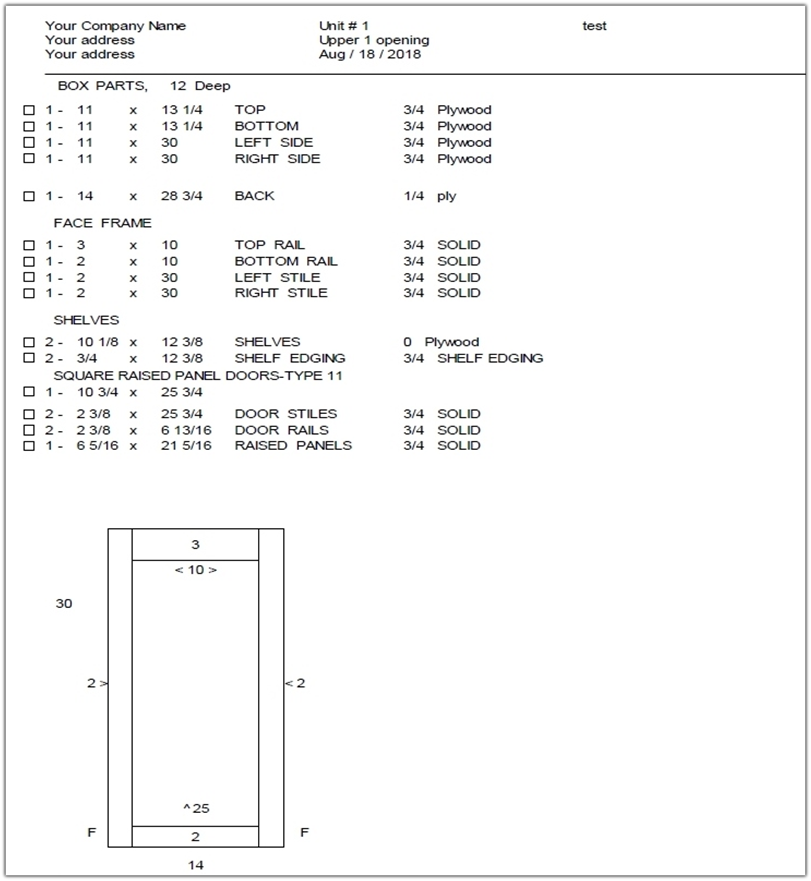
In the shop plan below we see that this cabinet needs two 11” x 30” sides and two 11” x 13 1/4” top & bottoms. This cabinet is setup for using dados, if we were using butt joints the top & bottom would be 12 1/2” long.
Copyright 2005-2025 Cabinet Planner LLC
Using a table saw, start by cutting an 11” strip from your plywood sheet. Then cut the two 30” sides, and then the two 14 1/4 tops and bottoms.
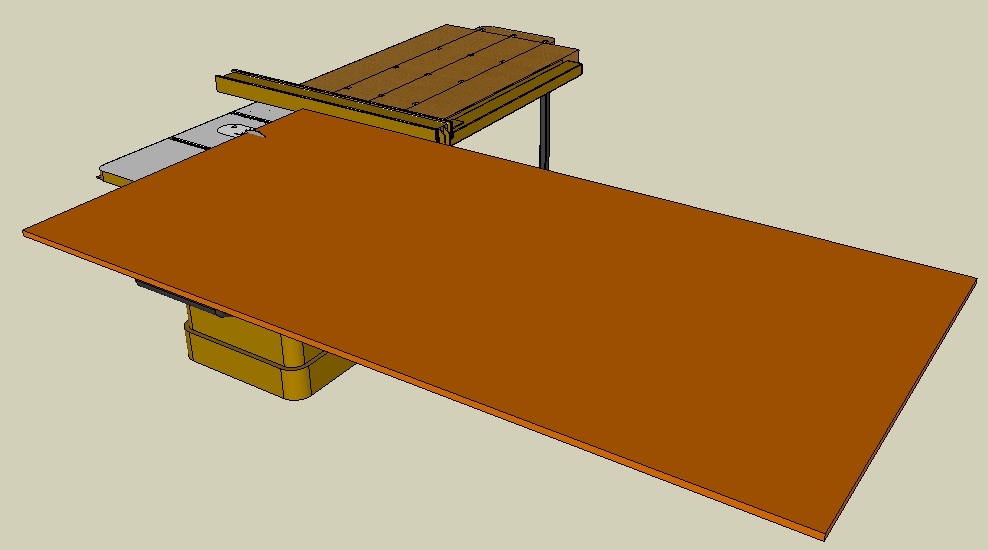
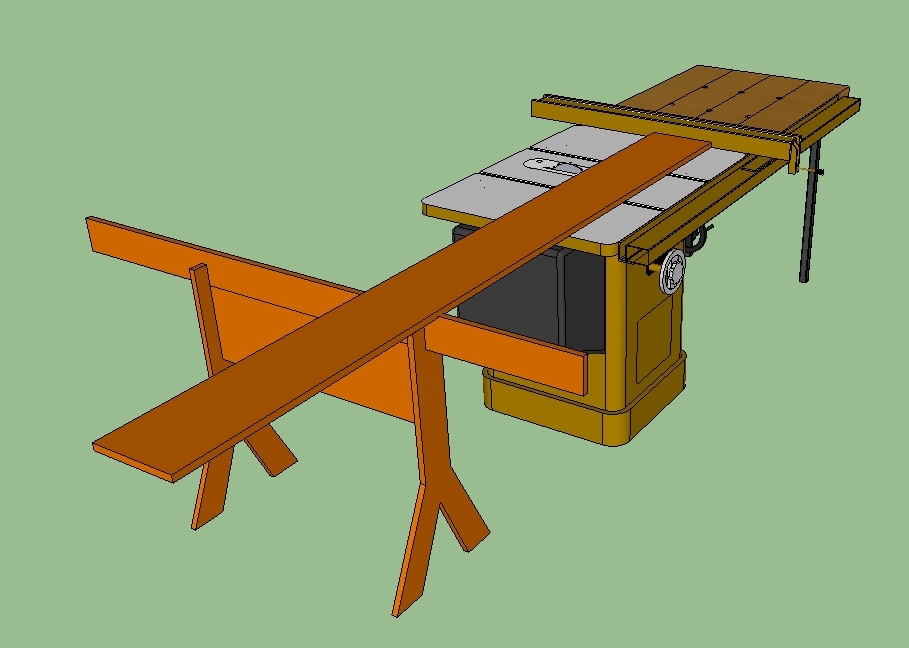
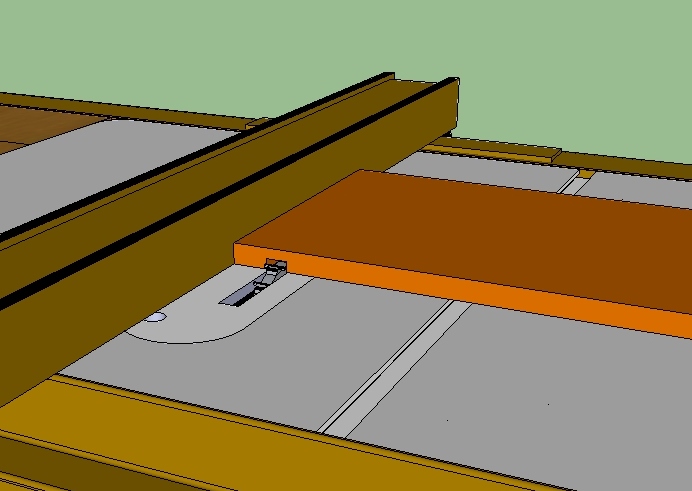
When cross cutting longer pieces on a table saw, a table saw horse comes in very handy. The exact design isn’t very important so long as it is sturdy, the same height as the saw and about 6 feet long.
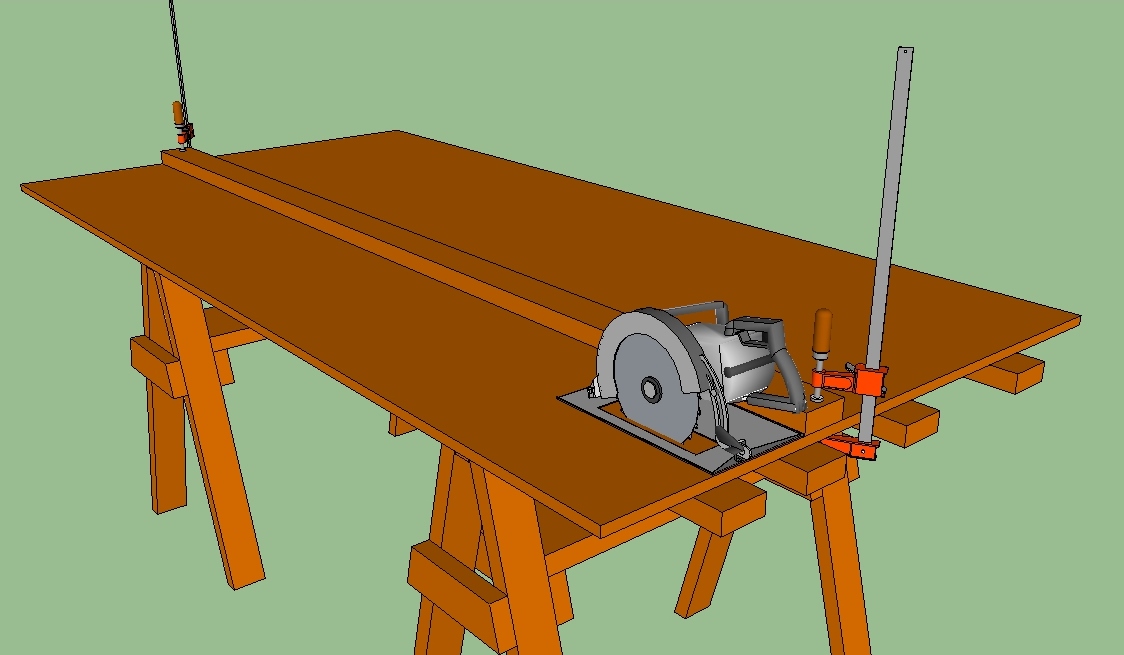
If you do not have a table saw, a skilsaw and straight edge will work. Just measure from the edge of the saw’s bottom plate to the far side of the blade and add that dimension to the size you need for the part. When cutting with a table saw or skilsaw, a good triple chip blade will give a good clean cut, especially when cross cutting against the grain. This is one piece of equipment you should not skimp on.
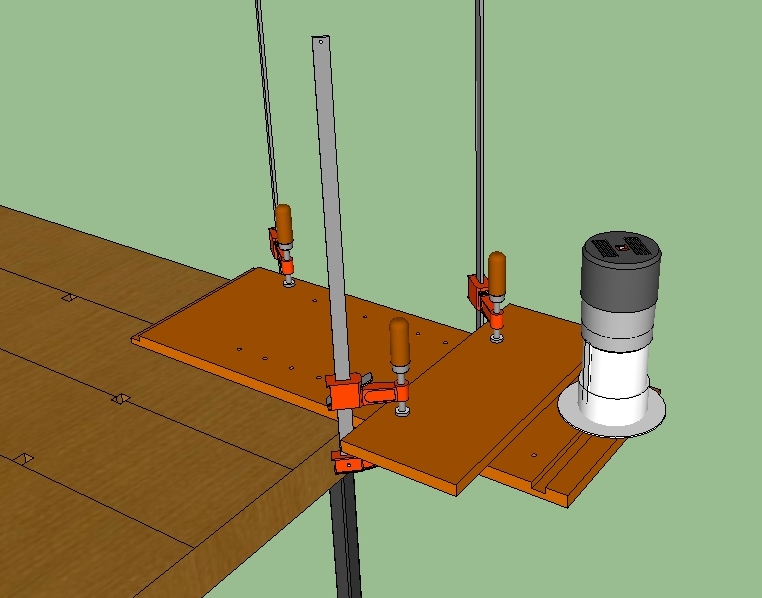
Once your parts are cut you can add the dados. This can be done with a dado blade in your table saw or with a router and straight edge. When routering the dados you need to go from right to left. This will use the force of the spinning router bit to hold the router tight to the straight edge.
Assuming 3/4” material and a 2” bottom rail, you want to start the bottom dado at 1 1/4”. The top is a 3/4” rabbet, meaning it starts flush with the end of the side.
Assuming 3/4” material and a 2” bottom rail, you want to start the bottom dado at 1 1/4”. The top is a 3/4” rabbet, meaning it starts flush with the end of the side.
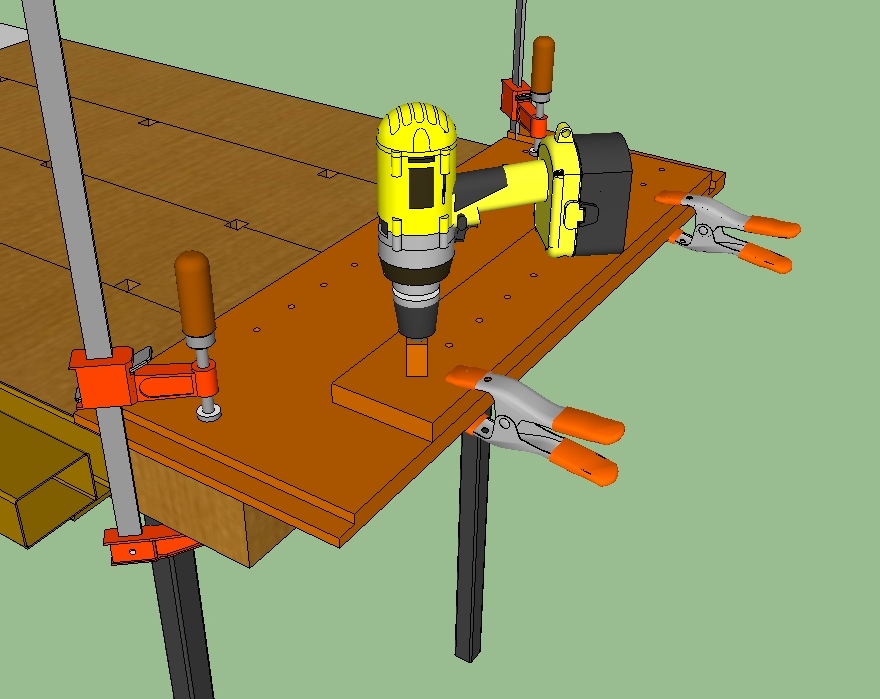
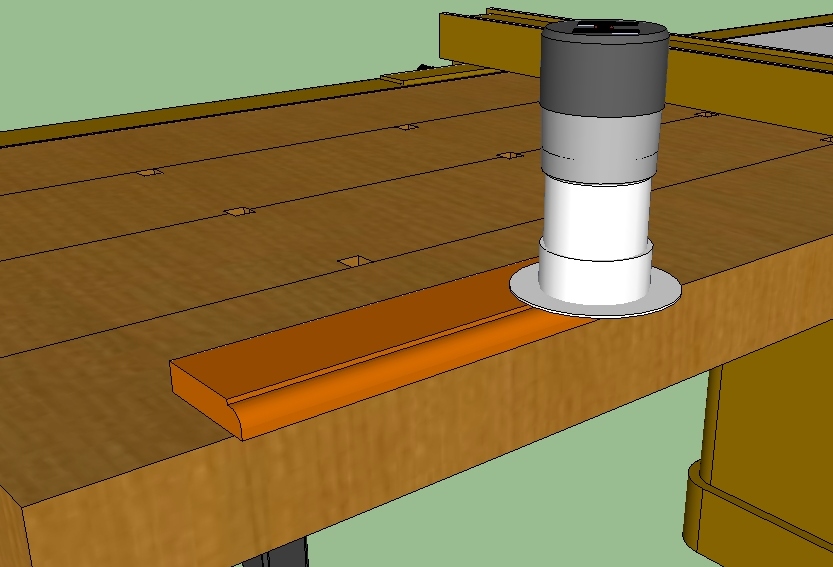
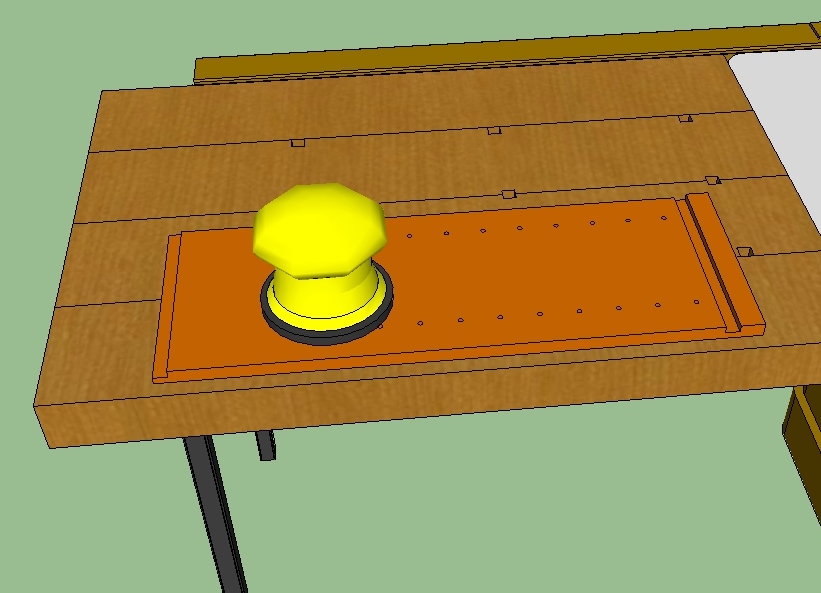
Next you drill the shelf holes. If you do not have a dedicated line drilling machine an easy way to do this and have them all match up perfectly is to make a jig from 1/2” or 3/4” material as shown below. Make it 3” wide and center the holes at 1 1/2”. Cut a short piece of 3/4” x 3/4” stock to use as a depth gauge. (When clamping your parts such as below, you should place a piece of scrap between the clamp and your parts to prevent making a mark.)
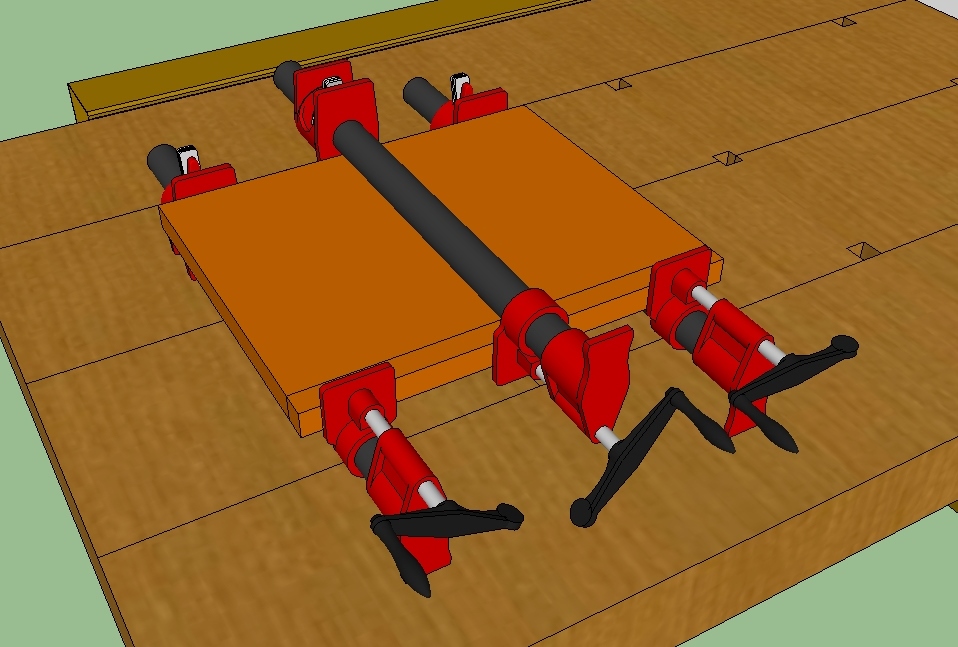
Next cut your two shelves and the edging for them. Glue and clamp the front edges to the shelves. Don’t go crazy with the glue. You want just enough so a little bit is squeezed out when the clamps are tightened. When the glue has setup but not completely dry unclamp the shelf and use a paint scraper to remove the excess glue. NEVER use a wet towel for glue removal, you will just smear the glue into the wood grain and it will look terrible when you stain it.
Cut your screw strip and, if you would like, put an edge on it. The edge is a nice touch and looks a little better, especially if the cabinet has glass doors.
Now cut the back for the cabinet and then sand the shelves, back and interior cabinet surfaces with an orbital sander with 120 grit paper. Follow that with 220 grit.
And that is it for the cabinet box parts.