Copyright 2005-2025 Cabinet Planner LLC
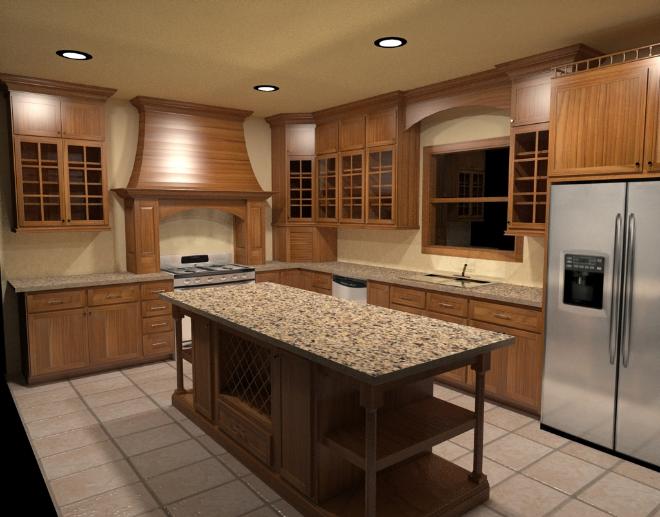
Once you have your job created, the program can create a Wavefront object file (.Obj) that can be imported into Kerkythea (as well as others) to render a photo realistic image. Kerkythea is a powerful yet fairly easy to use program that can create amazing 3d renderings of a scene. Below is a step by step walk through which will get you started.
You can install Kerky from their website here: http://www.kerkythea.net/cms/
In Cabinet Planner, open the job you want to render and make sure everything is as you want it. Then , under the File menu select “Create Object File”. A folder (Cabinet Planner Object Files) will be created in your Documents folder and two files will be created there. The first is the .Obj file and the other is the material file that describes the colors or bitmaps to use on the individual items in the job. The program will also place a copy of the bitmaps used in the job there, for ease of use with more advanced renderings.
Open Kerky and then press the Open button on the toolbar. Navigate to your Documents folder and then open the “Cabinet Planner Object Files” folder. Then select the .Obj file.After it loads there will be a list along the left side of the window. On the toolbar you will see buttons with a pointer, a red dot with arrows around it and a hand. These are the most commonly used tools.Press the button with the red dot and you will be able to rotate the scene around. Don’t worry too much about aligning it perfectly just yet.
Press the “V” key on your keyboard and the scene will have the textures & colors applied to everything.
If you have added Can Lights to your job, right click on “Can_light” in the list and select “Edit material”. In the “Self Luminance” box, right click on the word Radiance and then select “Add color”. Select the color you want the light to give off, usually white, and then press the Accept button. Increase the power to 20 and then press the “Apply changes” button. Press the Close Editor button.
You can now begin a basic rendering of the job. Press round green button on the toolbar. The Camera and Settings window will open. Under Resolution select at least 800x600. Under Settings select setting 6 (this is a good starter). Press the OK button and it will begin rendering the scene. If you haven’t added any lights it will ask if you want to use the default highlights (this isn’t as good as adding actual lights but it works). There is a small preview window on the bottom right on the program. For a larger view press the green “Image” button.
Once the scene starts rendering you might decide you want to zoom in or change the angle of view. If so, press the red Stop Render button and then wait a bit for it to stop. Reset the scene and start rendering again. At any point in the rendering you can press the Save button in the preview window to save a jpeg of the scene.
While the program is setup to create a pretty good rendering with little effort, there is a limit as to what settings can be applied to the scene through the material file. For more advanced renderings you will need to edit more of the materials. One of the easiest that gives the most improvements is with the wood.
Right click “wood” in the material list and select Apply Material > Basic Pack > Plastic. This will change all the wood in the job to a white color, but don’t worry. Now right click “wood” again select Edit Material. In the Reflectance groupbox, right click the white square next to Diffuse and delete it. Now right click on the Word Diffuse and select Add Bitmap. Press the Browse button in the Bitmap Selection window and then select the bitmap used for the job. Press the Apply Changes button in the material editor window and then close the editor window.
Another easy change is for if you have glass in the job. Simply right click “glass” in the material list and select Apply Material > Basic Pack > Thin Glass. This will give the glass in doors or windows a nice reflection.
For knobs or handles you can use either Silver or Bronze in the Basic Pack. You may also want to apply the Silver to a sink. By default these materials are not very shinny. To increase their shininess, right click the material and select Edit Material. In the Reflectance groupbox you can increase the value for the Shininess. 2000 seems to be about the max.
You can add a texture to the floor in the same manner as the wood. With a floor it is often nice to add a “bump map”. This
will help to highlight the edges or make the surface look textured. In the Material Editor window right click on Texture in the Bump Mapping groupbox and select add bitmap. Select the same bitmap you used for the floor and then press the Apply Changes button. You can also do this with the wood in the job but it usually makes it look too rough.
One of the best rendering settings is #19, Metropolis Light Transport. I have no idea what that means but this setting is mentioned often in the Kerky forum. It isn’t the fastest though and a rendering can take up to 10 hours to get to a point where it is as good as it will get. Again, you can stop the rendering at any time and save the image. When you start rendering with this setting you will notice that the window title will say Ray Tracing 1/10000. This means it will render the scene 10000 times with each one a little better. Usually around 200 is all that is needed.